Welcome to the instruction manual for old Singer sewing machines‚ your essential guide to understanding‚ maintaining‚ and operating these timeless devices effectively. This manual provides detailed insights into setup‚ operation‚ and troubleshooting‚ ensuring optimal performance and longevity for sewists of all skill levels.
Purpose and Scope of the Manual
This manual is designed to serve as a comprehensive guide for operating and maintaining old Singer sewing machines. Its purpose is to provide clear‚ step-by-step instructions for setup‚ operation‚ and troubleshooting‚ ensuring optimal performance. The scope includes detailed information on threading‚ stitch selection‚ and maintenance routines‚ as well as solutions for common issues. Whether you’re a novice or an experienced sewist‚ this manual aims to empower you with the knowledge needed to maximize your machine’s potential. By following the guidelines outlined‚ you can ensure longevity‚ efficiency‚ and high-quality stitching for all your sewing projects.
Importance of Following the Manual
Adhering to the instructions in this manual ensures safe and effective operation of your old Singer sewing machine. Proper setup‚ maintenance‚ and troubleshooting techniques prevent damage and extend the machine’s lifespan. Misuse can lead to mechanical issues‚ reducing performance and longevity. By following guidelines‚ you maintain optimal stitching quality and avoid costly repairs. The manual also highlights safety precautions‚ reducing risks of accidents. Consistent with Singer’s legacy of reliability‚ adhering to these instructions guarantees efficient and durable performance‚ making your sewing experience enjoyable and rewarding for years to come.

Safety Precautions and Basic Setup
This section outlines essential safety precautions and basic setup steps for old Singer sewing machines‚ ensuring safe operation and optimal performance. Proper setup and adherence to safety guidelines are crucial for preventing accidents and maintaining machine longevity.
Unpacking and Initial Inspection
When unpacking your vintage Singer sewing machine‚ handle it with care to avoid damage. Inspect the machine for any signs of wear or shipping damage. Ensure all components‚ such as the needle‚ bobbin‚ and accessories‚ are included. Check for any loose parts or misalignments. Refer to the provided manual or downloaded PDF guide to verify the completeness of your machine. Clean the exterior gently with a soft cloth before use. Familiarize yourself with the controls and features‚ as older models may differ from modern designs. This step ensures a smooth setup process and prevents potential issues during operation.
Placing the Machine on a Stable Surface
Position your vintage Singer sewing machine on a sturdy‚ flat surface‚ such as a dedicated sewing table or cabinet. Ensure the surface is level to prevent uneven operation and vibration. Avoid placing the machine on soft or unstable surfaces‚ as this may affect its performance. If using a table‚ secure it firmly to prevent movement during use. Keep the machine away from direct sunlight and moisture to preserve its condition. Ensure good lighting around the workspace for visibility. Maintain a clear area around the machine to avoid clutter and allow smooth operation. Proper placement enhances safety‚ stability‚ and sewing efficiency;
Understanding the Machine Components
Familiarizing yourself with your old Singer sewing machine’s components is essential for effective operation. Key parts include the balance wheel‚ spool pins‚ and stitch regulators‚ each playing a vital role in machine functionality and fabric handling.
Identifying Key Parts and Their Functions
Understanding your old Singer sewing machine begins with identifying its key components. The balance wheel controls needle movement‚ while the spool pins hold thread. The stitch regulator adjusts seam length‚ and the bobbin case manages the bottom thread. The tension discs ensure even thread flow‚ and the take-up lever regulates fabric feeding. Familiarizing yourself with these parts and their roles is crucial for proper operation‚ troubleshooting‚ and maintenance. Refer to your manual for detailed diagrams and descriptions to ensure you understand each component’s function and how they work together to create perfect stitches.
Differences Between Old and Modern Singer Models
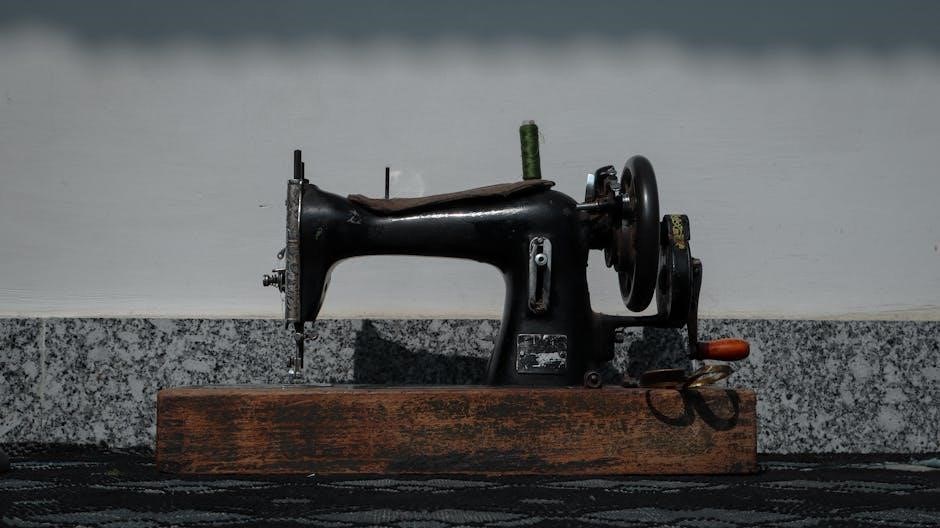
Old Singer sewing machines‚ like the 15-91 and 20U models‚ are known for their mechanical simplicity‚ durability‚ and limited stitch options. They often feature metal construction‚ manual threading‚ and basic yet reliable operation. In contrast‚ modern Singer models‚ such as the Quantum Stylist or HD6800‚ are computerized‚ offering advanced features like automatic threading‚ hundreds of stitch patterns‚ and LCD screens. While older models emphasize craftsmanship and longevity‚ modern machines prioritize convenience and versatility. Understanding these differences helps users appreciate the evolution of sewing technology and choose the right machine for their needs‚ whether preferring traditional reliability or modern innovation.
Threading and Bobbin Setup
Properly threading your old Singer sewing machine and setting up the bobbin are essential for smooth operation. Follow the step-by-step guide to ensure accurate thread flow and tension.
Step-by-Step Threading Guide
Start by raising the needle to its highest position. Gently pull the thread from the spool and guide it through the tension discs‚ ensuring it clicks into place. Next‚ loop the thread around the take-up lever and pull it taut to set the tension. Thread the needle from front to back‚ leaving a small tail. For the bobbin‚ wind the thread evenly and insert it into the bobbin case‚ making sure the thread exits through the slot. Pull gently to seat the thread‚ then lower the needle to test the stitch. Proper threading ensures smooth stitching and prevents machine jams.
Proper Bobbin Installation Techniques
Installing the bobbin correctly is crucial for smooth stitching. First‚ ensure you’re using the right size and type of bobbin for your Singer machine. Wind the thread tightly and evenly around the bobbin to prevent loose thread. Place the bobbin into the bobbin case‚ ensuring it’s seated properly‚ and guide the thread through the slot. Pull gently to secure it. Keep a small tail of thread for the needle to catch. After threading the machine‚ test the tension by gently tugging the thread. Proper installation prevents jams and ensures balanced stitches. Avoid over-tightening‚ as this can misalign the bobbin and affect stitch quality.
Selecting the Right Stitch Type
Selecting the right stitch type involves understanding fabric requirements and matching them to the machine’s versatile stitching options. Refer to your Singer model’s stitch guide for optimal results.
Understanding Stitch Options for Various Fabrics
Understanding stitch options is crucial for achieving professional results. Singer sewing machines offer versatile stitches suited for different fabrics. For delicate fabrics like silk or cotton‚ use straight or zigzag stitches. Heavier materials such as denim or canvas require stronger‚ reinforced stitches. Refer to your machine’s stitch chart for fabric-specific settings. Proper stitch selection ensures even seams and prevents fabric damage. Always test stitches on scrap fabric before starting your project; This guide provides detailed recommendations for various fabric types‚ helping you make informed decisions for optimal results.
Adjusting Tension for Optimal Stitch Quality
Proper tension adjustment is essential for achieving even‚ consistent stitches. Singer sewing machines feature adjustable tension knobs for both the upper and bobbin threads. Begin by threading the machine correctly‚ then test the tension by pulling gently on the thread. If the stitches are uneven or the fabric puckers‚ adjust the tension knobs until the stitches are balanced. For heavier fabrics‚ slightly increase tension‚ while lighter fabrics may require a lighter touch. Always test adjustments on scrap fabric before sewing your final project to ensure optimal results.

Maintenance and Troubleshooting
Regular cleaning and oil application are vital for smooth operation. Address common issues like thread jams or uneven stitches promptly to ensure optimal performance and longevity.
Regular Cleaning and Oil Application
Regular cleaning and oil application are essential for maintaining your old Singer sewing machine’s performance and longevity. Start by turning off and unplugging the machine. Use a soft brush or lint remover to clear dust and debris from the bobbin area‚ tension discs‚ and feed dogs. Apply a few drops of high-quality sewing machine oil to moving parts‚ such as the handwheel and gears‚ to ensure smooth operation. Repeat this process every 1-2 months or after heavy use. Proper lubrication prevents friction and extends the life of your machine‚ keeping it in optimal working condition for years to come.
Common Issues and Their Solutions
Common issues with old Singer sewing machines include thread breaking‚ uneven stitching‚ or the machine not powering on. For thread breaking‚ check for tangles‚ improper threading‚ or dull needles. Replace needles regularly and ensure correct tension settings. If stitches are uneven‚ inspect the bobbin for proper installation and adjust the tension discs. For machines that won’t turn on‚ verify power supply connections and ensure the plug is securely inserted. Lubricate moving parts if the machine is noisy or sluggish. Refer to the manual for specific solutions‚ and always use genuine Singer replacement parts for optimal performance and longevity.
For continued use and creativity‚ download free PDF manuals from Singer’s official website or authorized dealers. Visit support pages for troubleshooting guides and maintenance tips.

Final Tips for Longevity and Performance

Regularly clean and oil your Singer sewing machine to maintain smooth operation. Use only Singer-recommended needles and threads. Store the machine in a dry‚ cool place to prevent rust. Avoid forcing fabric through the machine‚ as this can damage internal components. Always refer to the manual for model-specific maintenance schedules. For optimal performance‚ ensure proper tension adjustment and avoid overloading the machine. Regularly inspect and replace worn parts to prevent further damage. By following these tips‚ you can extend the life of your Singer sewing machine and ensure years of reliable service. Consult your manual for detailed care instructions.
Where to Find Additional Manuals and Support
Additional manuals and support for old Singer sewing machines can be found on Singer’s official website or through authorized retailers. Many models have free‚ downloadable PDF manuals available‚ covering setup‚ maintenance‚ and troubleshooting. Visit Singer’s dedicated manuals page‚ where you can search by model number to find specific guides. Singer has also joined the Green Initiative‚ making manuals exclusively available online to reduce environmental impact. For further assistance‚ Singer’s customer support team is available to address queries and provide model-specific advice. These resources ensure you can easily access the information needed to keep your machine in optimal condition.