
Welcome to the Top Solar Charge Controller Manual, your comprehensive guide to understanding and optimizing solar power systems. This manual provides detailed instructions for installation, operation, and maintenance to ensure safe and efficient energy management.
Overview of Solar Charge Controllers
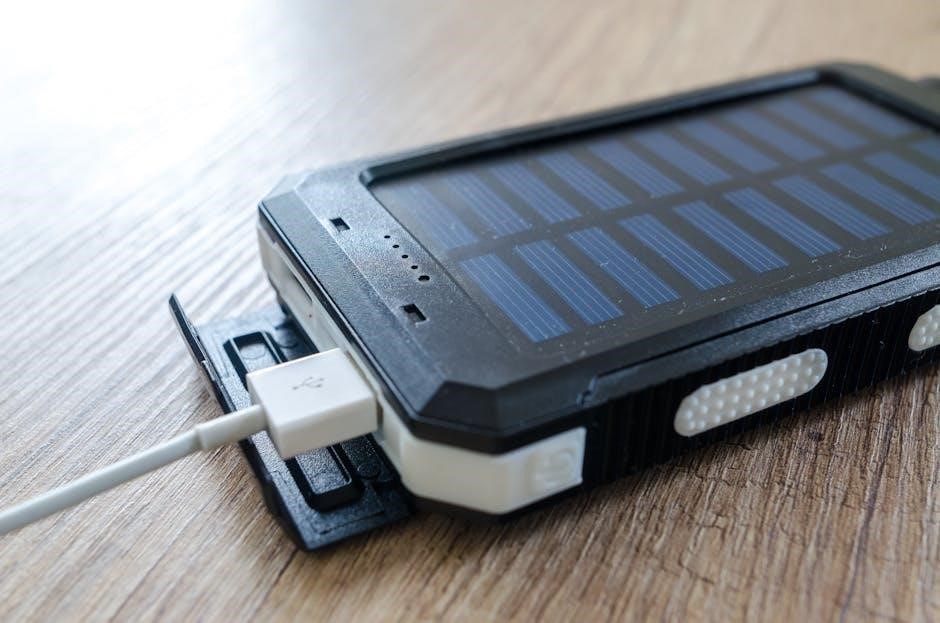
Solar charge controllers are essential components in solar power systems, regulating energy flow between solar panels, batteries, and loads. They prevent overcharging, protect batteries, and ensure efficient energy storage. Controllers come in types like PWM and MPPT, each offering unique benefits for different applications. This manual provides a detailed guide to understanding these devices, their features, and proper usage, ensuring safe and optimal performance of your solar system.
Importance of Reading the Manual
Reading the manual is crucial for safe and effective use of your solar charge controller. It provides essential safety guidelines, installation steps, and operational tips to prevent damage and ensure optimal performance. Proper understanding of the controller’s features and settings helps maximize energy efficiency and prolong battery life. Failure to follow instructions can lead to electrical hazards or system malfunctions. Always refer to the manual before installation, maintenance, or troubleshooting to guarantee a reliable and efficient solar power system.

Types of Solar Charge Controllers
Solar charge controllers are primarily of two types: PWM and MPPT. PWM controllers are suitable for small to medium systems, while MPPT controllers offer advanced efficiency for larger applications.
PWM (Pulse Width Modulation) Controllers
PWM controllers are a cost-effective solution for solar charging systems. They regulate energy flow by modulating the width of the electrical pulses sent to the battery. Suitable for 12/24V systems, they are ideal for smaller applications like RVs or boats. These controllers are known for their simplicity and reliability, making them a popular choice for basic solar setups. Ensure proper installation by following the manual to avoid overcharging and maintain system efficiency.
MPPT (Maximum Power Point Tracking) Controllers
MPPT controllers optimize energy harvest by tracking solar panels’ maximum power point, increasing efficiency by up to 30% compared to PWM controllers. They adapt to varying voltages and currents, ideal for larger or high-voltage systems. Advanced models offer ultra-fast tracking and smart monitoring features. Suitable for both lead-acid and lithium batteries, MPPT controllers are a superior choice for maximizing solar performance and extending battery life in demanding applications. Always refer to the manual for specific setup and customization guidelines.
Installation and Setup
Begin by connecting the battery to the controller, ensuring correct polarity. Use appropriate connectors and follow the manual’s safety guidelines to avoid electrical hazards.
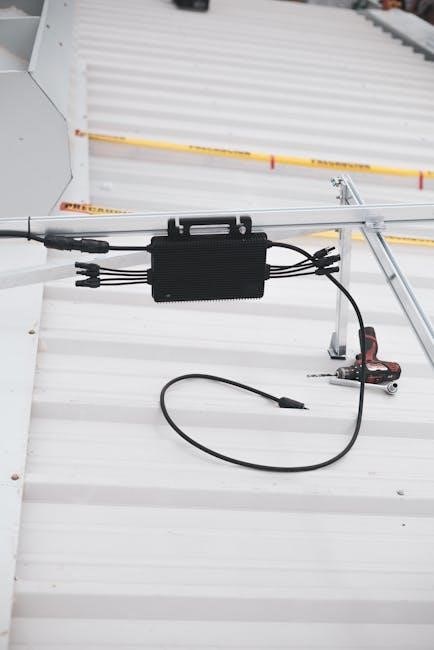
Connecting Solar Panels to the Controller
Connect the solar panels to the controller using terminals 1 and 2, ensuring correct polarity. Use MC4 connectors for secure and weatherproof connections. Before connecting, verify the voltage and current ratings match the controller’s specifications. Always switch off the controller before making connections to prevent damage. Follow the manual’s guidelines for series or parallel configurations to optimize energy output. Double-check all connections and test the setup with a multimeter to ensure proper functionality.
Connecting the Battery to the Controller
Connect the battery to the controller using terminals 3 and 4, ensuring correct polarity. Select the appropriate battery type (lithium or lead-acid) as indicated in the manual. Always disconnect the battery in reverse order to prevent damage. Use insulating tools to reduce the risk of electric shock. Ensure all connections are secure and test the setup with a multimeter before use. Follow the manual’s guidelines for proper connection and configuration.
Connecting Consumer Appliances
Connect consumer appliances to terminals 5 and 6 of the controller, ensuring correct polarity. Always connect the battery first before linking appliances to avoid damage. Use appropriate connectors such as cigarette lighter plugs or alligator clips based on your setup. Disconnect appliances in reverse order when removing power. Ensure all connections are secure to prevent short circuits. Properly configure settings to match your appliance requirements. Always verify the setup with a multimeter before use. Follow the manual’s guidelines for safe operation.

Features and Settings
The Top Solar Charge Controller offers advanced features like voltage and current regulation, overcharge protection, and customizable settings. It includes an LCD display for real-time monitoring.
Voltage and Current Ratings
Understanding voltage and current ratings is crucial for optimal performance and safety. The controller supports 12/24V systems, with adjustable settings for 36V, 48V, or higher. Ensure the ratings match your solar panels and battery to prevent overloading. Voltage and current limits protect against overcharge and discharge, safeguarding your system. Always refer to the manual for specific rating details and adjustments. Proper configuration ensures efficient energy management and longevity of your solar power setup.
Charge Regulation and Protection Mechanisms

The solar charge controller ensures safe and efficient charging by regulating voltage and current flow. It prevents overcharging and deep discharging, safeguarding the battery. Protection mechanisms include overvoltage protection, short-circuit prevention, and undervoltage protection. The controller also detects load shock faults, ensuring stable operation. These features protect both the battery and connected appliances from damage; Proper charge regulation and protection extend the lifespan of your solar power system and ensure reliable performance. Always follow manual guidelines for optimal settings.

Safety Precautions
The solar charge controller regulates voltage and current to prevent overcharging and deep discharging, safeguarding the battery. It includes overvoltage, short-circuit, and undervoltage protection, ensuring system stability. The controller detects load shock faults and protects against reverse polarity. These mechanisms extend battery life and prevent damage to connected appliances. Proper settings are crucial for optimal performance and safety. Always follow manual guidelines for configuration.
General Safety Guidelines
Always use insulating tools to minimize the risk of electric shock. Wear protective gear, such as non-slip gloves and appropriate work clothing, during installation and maintenance. Ensure the system is grounded properly to prevent electrical hazards. Avoid touching electrical components without proper insulation. Follow the recommended connection sequence: battery first, then solar panels, and finally consumer appliances. Reverse the order when disconnecting to prevent damage or short circuits. Adhere to all safety instructions provided in the manual for optimal performance and safety.
Proper Connection Sequence
Always follow the correct connection sequence to ensure safe and efficient operation. Connect the battery to the controller first, followed by the solar panels, and then the consumer appliances. This sequence prevents sudden power surges and potential damage to the system. When disconnecting, reverse the order: remove consumer appliances first, then the solar panels, and finally the battery. Improper connection sequences can lead to short circuits, component damage, or unsafe operating conditions. Always refer to the manual for specific guidelines.

Maintenance and Troubleshooting
Regularly inspect connections, clean surfaces, and check for wear. Monitor system performance and address issues promptly. Consult the manual for troubleshooting common problems efficiently.
Regular Maintenance Checks
Perform routine inspections of connections to ensure they are tight and free from corrosion. Clean the controller’s surfaces to prevent dust buildup and overheating. Monitor the system’s performance regularly to identify potential issues early. Check for error codes or unusual displays, and refer to the manual for guidance. Ensure all settings remain configured correctly and update firmware if necessary. Regular maintenance helps extend the lifespan of your solar charge controller and ensures optimal energy management.

Troubleshooting Common Issues
Identify error codes or unusual displays on the controller to diagnose problems. Check for loose connections or corrosion, as these can disrupt charging. Ensure the solar panel input and battery connections are secure. Verify that the load appliances are within the controller’s rated capacity to prevent overload. If issues persist, consult the manual for specific troubleshooting steps or contact customer support. Regular checks help resolve problems quickly, ensuring efficient energy management and system reliability.

Advanced Settings and Customization
Adjust voltage and current parameters for optimal performance. Utilize smart monitoring features to track energy production and storage. Customize settings for lithium or lead-acid batteries effortlessly.
Adjusting Voltage and Current Parameters
Adjusting voltage and current parameters ensures optimal performance. Use the LCD display or digital interface to set custom voltage levels for charging and discharging. This prevents overcharge and undercharge scenarios. For lithium batteries, set specific voltage thresholds to extend lifespan. Lead-acid batteries require different settings to avoid gassing. Use the manual guidelines to input precise values, ensuring compatibility with your system. Regularly monitor and tweak settings based on energy demand and environmental conditions for maximum efficiency and safety.
Using Smart Monitoring Features
Modern solar charge controllers offer advanced monitoring capabilities. Use the built-in LCD or remote monitoring apps to track real-time data, such as voltage, current, and temperature. This allows you to optimize system performance and identify potential issues early. Enable data logging to review historical performance and plan energy usage efficiently. Remote access via Wi-Fi or Bluetooth ensures convenience, letting you adjust settings or receive alerts from anywhere. These features enhance system transparency and simplify troubleshooting for a seamless solar experience.